DIY: ENVE/GoPro Dual Mount

Gotta get that 'gram! In the past I've ridden with a smartphone and sometimes a compact camera. Both have pluses and minuses. A smartphone definitely reigns king for its ease of use, but it really struggles with image quality outside of mobile viewing. The compact digital camera may hold top spot in terms of image quality, especially if shooting in RAW, but the investment is much more substantial while being cumbersome for quick shooting. Therefore, neither is really ideal for video content. So what solution could possibly sit in the middle of the dilemma? Enter the GoPro.
To be honest, mounting a GoPro to your bike is really not that hard. There are quite a few options already available as either dedicated mounts or even ones integrated into your Garmin mount. These are definitely the easiest and fastest solutions. The downside is that many of these do not place the camera directly in line with your on bike point of view or they require a second mount which clutters your cockpit. And finally, if you prefer to run a stem mounted Garmin mount such as the Barfly for Fizik, the ENVE computer mount, or even the Tune Portuer, then you're out of luck. But maybe not.
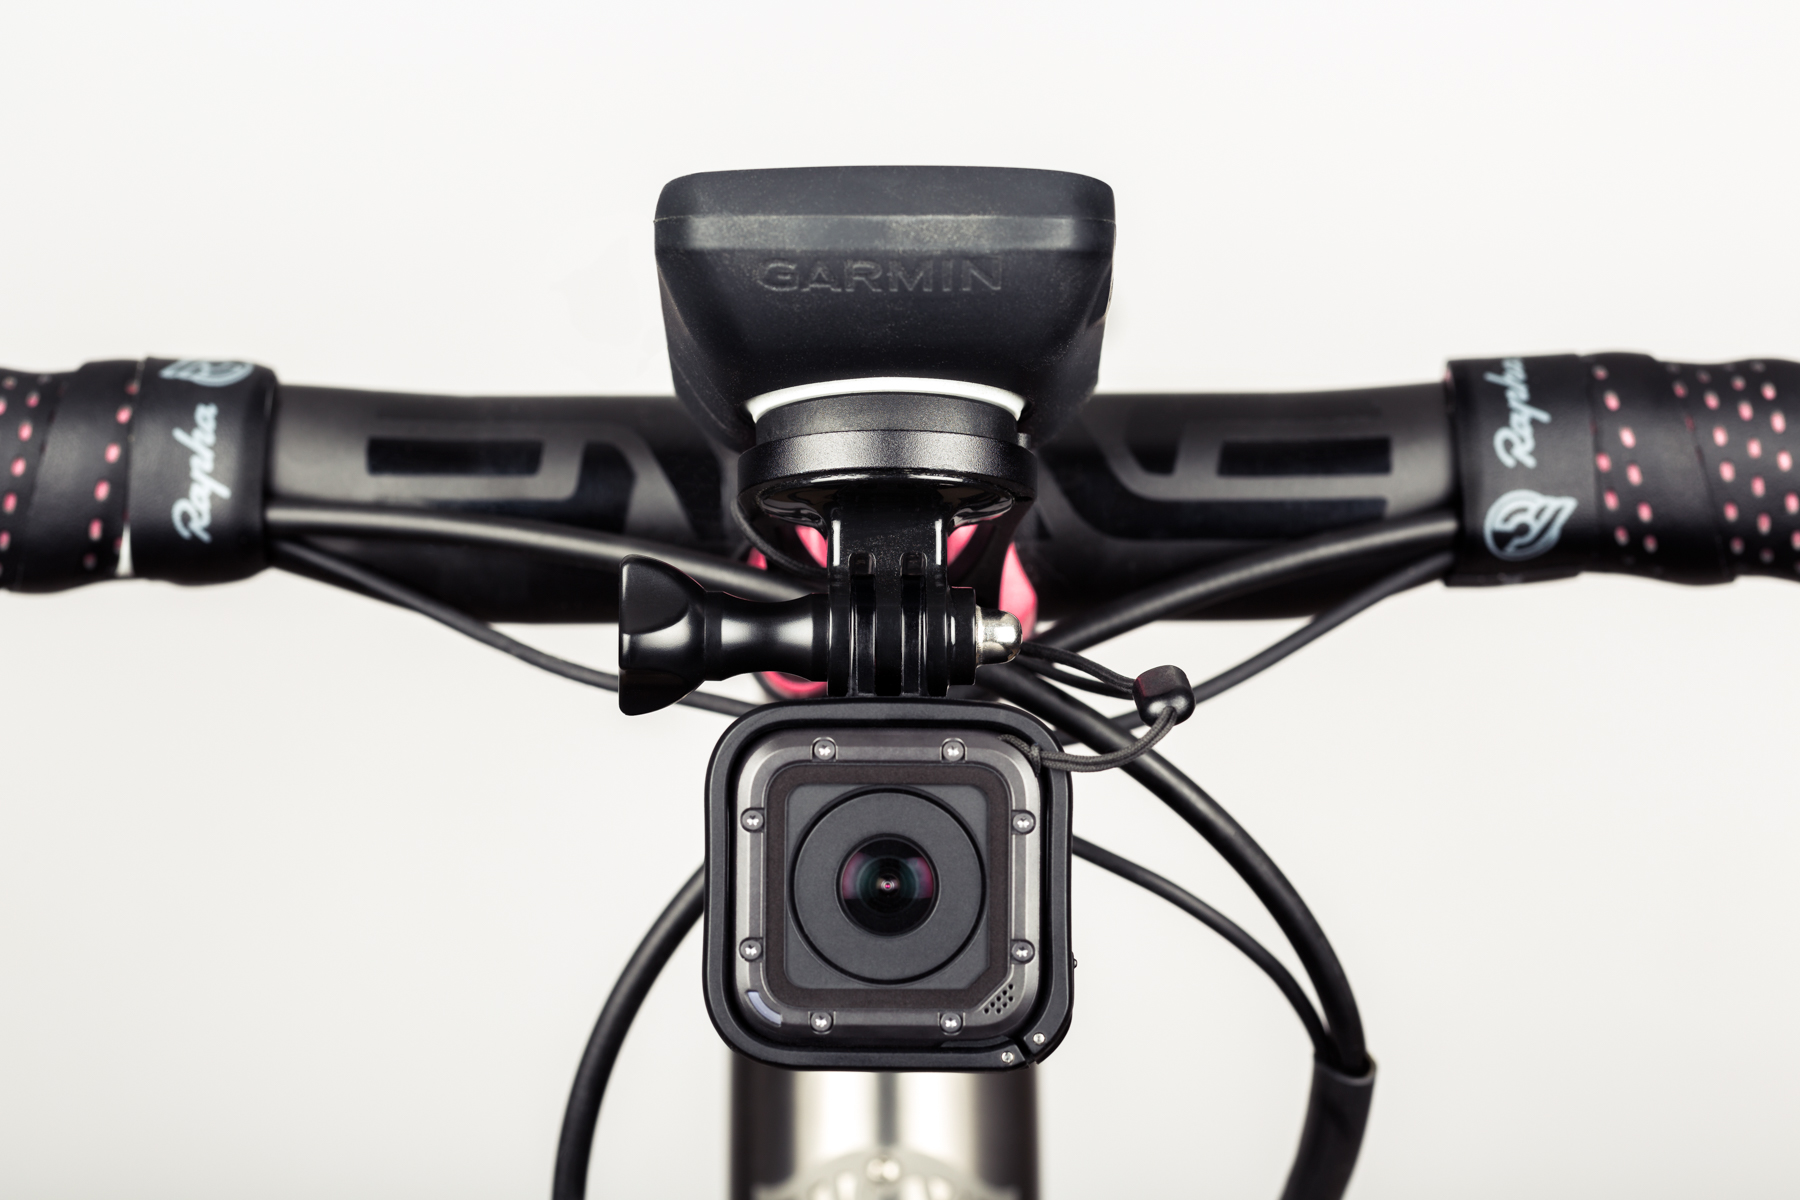
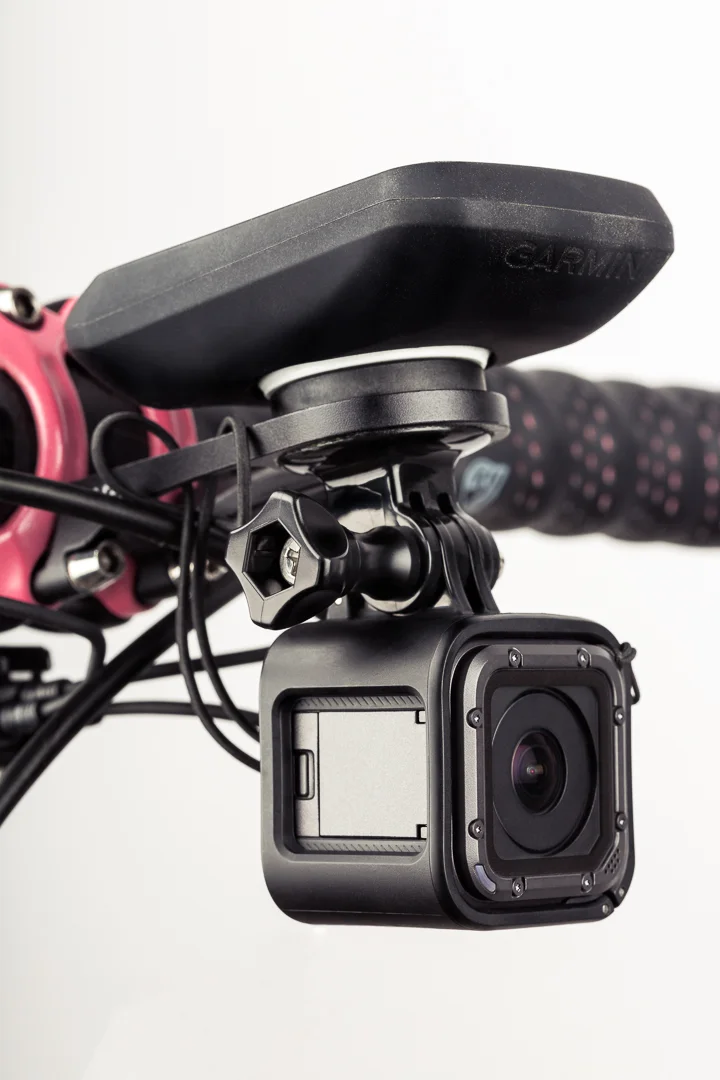
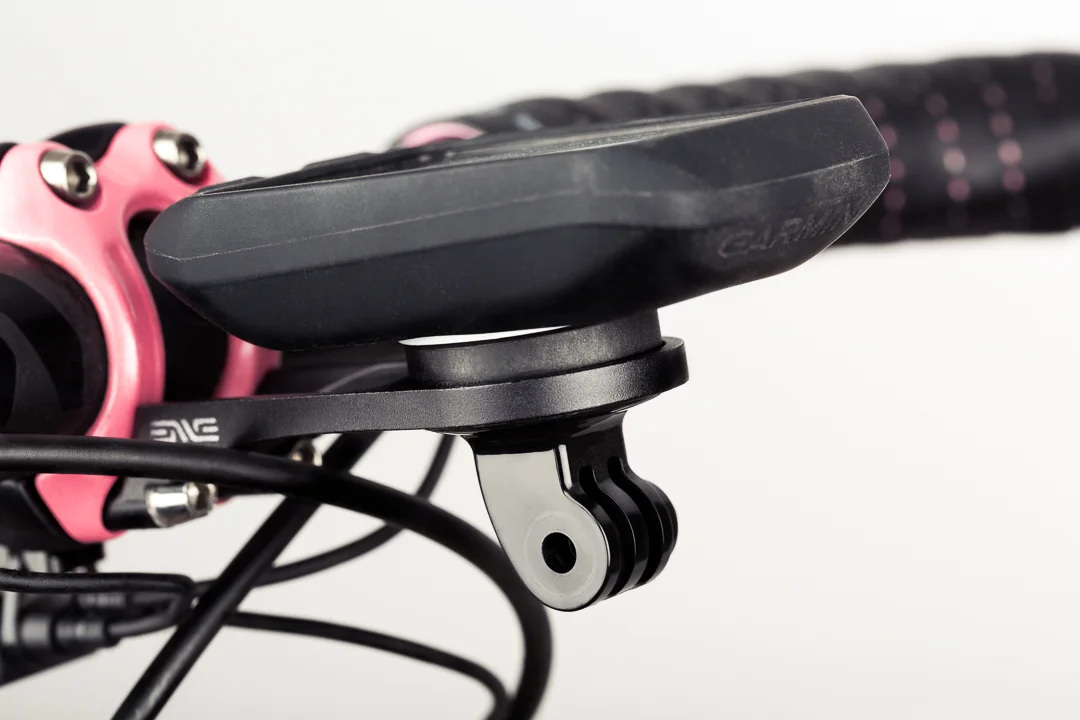
Over the winter I did a little DIY project and I want to share the How-To with you. The following instructions are for adding a GoPro to an ENVE computer mount. This works really well because, maybe by stroke of luck, the circumference of the stock round GoPro tripod mount is exactly the same as the underside of the ENVE mount. So for this DIY you're going to need to an ENVE stem, the ENVE computer mount, a round GoPro tripod mount, an 2mm and a 4mm allen key, torque wrench, epoxy, and maybe a clamp. That's it.
Caveat: This may only work on the ENVE stem mount v1. I hear the v2 design has changed but I haven't had a chance to see if this DIY would still be possible. I checked the Barfly for Fizik on my Cherubim and the GoPro tripod mount does not fit. When I get a chance I'll check the Tune mount.
Step 1: Prep
First, a bit of good news. Because all the fitting happens to work out perfectly, there are no real modifications to be made. So to prep, just check over all the materials and make sure there are no cracks or damaged parts. Once they bond together, they are stuck together. Which is what you want.
But before you do anything else, make sure you mark or make note of which side of the ENVE computer mount you want the GoPro to be mounted to so you don't forget and mess it up. Next you should use a 2mm allen key to remove the quarter turn insert of the Garmin mount. This is just in case you make a mess and need to clean up the other side. Better safe than sorry.
A critical prep step that will save you a lot of time and headache later will be to measure and mark a center line on both the ENVE and GoPro mounts. If you don't, you may end up with a GoPro off center and all your footage will be skewed. So find the center of the ENVE mount and use something non permanent to mark this line. Then do the same with the GoPro tripod mount. This one is a bit easier because there are three prongs on the mount and there is a ridge of plastic through the center line from where the mount was moulded. After measuring and marking, line these up and make sure you are confident this will be centered. If by chance you are using a GoPro Hero with a rear screen you can check your alignment with the screen before moving on.
Now find a clean spot to work and then get everything set up to go.
Step 2: Epoxy
The ENVE computer mount has a small recessed lip around the edge that is large enough to suffice in bonding to the GoPro mount. Start by applying epoxy to this edge and follow the directions if you need it to let it dry or not. After applying to the ENVE mount, add epoxy to the underside of the GoPro mount. You could just apply it to the area that will contact the lip but I chose to cover the whole thing, just in case. Depending on what epoxy you use, some will require you to mate the surfaces right away and some will require a drying time first. Follow your instructions!
Tip: When picking your epoxy or glue, make sure it's one suitable for plastic and metal.
Step 3: Alignment
With the two parts epoxied or pre-glued, and after you've waited the required time, bring the two parts together using the center line markings you made in the prep stage to make sure everything is lined up straight. Again, I can't express how critical the alignment is to your enjoyment later. Don't be impatient.
Step 4: Curing
Whether you are using an epoxy or a glue, it will require some time to cure in order to permanently bond. It's good to follow these instructions to ensure they adhere properly so you won't end up chucking your expensive GoPro onto the road. It doesn't hurt to gently clamp the two parts together to get a solid bond. I doubt most people have a vice but you can likely find something around the house. Now sit back and be patient.
Step 5: Finishing
It's possible that you may got excited and have used a bit too much glue or it expanded while it cured. It likely won't be visible when mounted back on the bike but take a few minutes to clean up the aesthetics if you need to. Since you're going to be mounting your expensive camera to your expensive carbon stem, I'm assuming you have a nice bike and don't want it soiled with a sloppy DIY job.
Now is also time to reinstall the quarter turn mount for your Garmin on the opposing side.
Step 6: Install.
Before you install the new dual mount on your bike, take a moment to test fit your GoPro on the mount and make sure nothing wonky happened. If your GoPro has a rear screen you can use it to check the alignment. If you are using a Hero Session 5 then you can use their GoPro mobile app.
When you are happy with everything, follow the ENVE instructions to reinstall the mount to your stem. One thing to keep in mind is that access to the mounting bolts on the same side as the GoPro mount will be compromised. It's a tight squeeze to get in there but it's still possible and I definitely recommend you use a torque wrench. Do not use a ball headed allen key!
That's it. You should now be the happy owner of a custom DIY ENVE dual mount for your Garmin and your GoPro. The epoxy should be very strong and hold through the worst bumps and jumps. If you're worried that it may come loose you can tether your GoPro to the ENVE mount. I've been using the tether that came with my Garmin but it's more for peace of mind. The mount is on there for good and after months of use it shows no signs of coming off.
Hope you enjoy this quick DIY instructional. If you think this is a bit too much for you to take on, there are some similar solutions available where someone has done the work for you. They come at a big premium but not everyone likes to DIY. If you try this on your own please let me know how you get on.


