Just The Tip: Cue Sheets

There are fewer greater rewards than paying it forward. In this quick post I want to pass along a tip that someone shared with me years ago. It's one of those little ideas with a whole lot of "ah ha."
Cue sheets are nothing new to cycling. They are a great way to keep track of where you are, where certain waypoints will come along, but most importantly, where you are headed. Whether you are riding alone or leading a group ride, a cue sheet can be invaluable. And while there may be no right or wrong way to use cue sheets, there is definitely a better way.
Most people will write cue sheets as a long series of rows for each directional change or milestone (hills, rest stops, descents, hazards). This long list is then taped to their top tube. This approach is effective and serves its purpose but it has drawbacks. The cue sheets can be quite long and awkward to read while riding. To use them you have to draw your eyes far back from the road ahead and maybe even change your riding position. So what if you could get the same info while minimizing the drawbacks? If that sounds interesting, keep reading.
Again, this wasn't my own idea. Rather it was a friend who tipped me off to turning cue sheets on their side and then wrapping them around the stem. This approach allows you to break a ride down into smaller chunks while placing the cue sheet further forward on the bike.
Here is how you make what a better cue sheet.
Instructions:
- Get the turn by turn instructions for your ride. Usually through Ride With GPS, Strava, or through your event organizer.
- Measure the flat, open, available space on your stem. The distance from the headset spacer or cap to where the stem swells just behind your bars.
- Measure the circumference of this part of your stem and add ~2cm.
- Transfer your height and width measurements to a fresh piece of paper.
- Divide the available space up into equal columns on your paper. The number of columns you need depends on how many waypoints your route has.
- Tip: leave about ~1cm open on the far right edge.
- Cut out your cue sheet
- Begin to transcribe your directions to the cue sheet by filling the columns top down and left to right
- Tip: Use a waterproof pen or marker so it won't blead or run all over your sweet whip
- Put Scotch tape along the far left edge of the cue sheet
- Wrap the cue sheet around your stem overlapping the left edge atop the open space you left on the opposite side.
- Tip: Leave the cue sheet a bit loose so it can rotate easily.
- Step back and admire your amazingness.
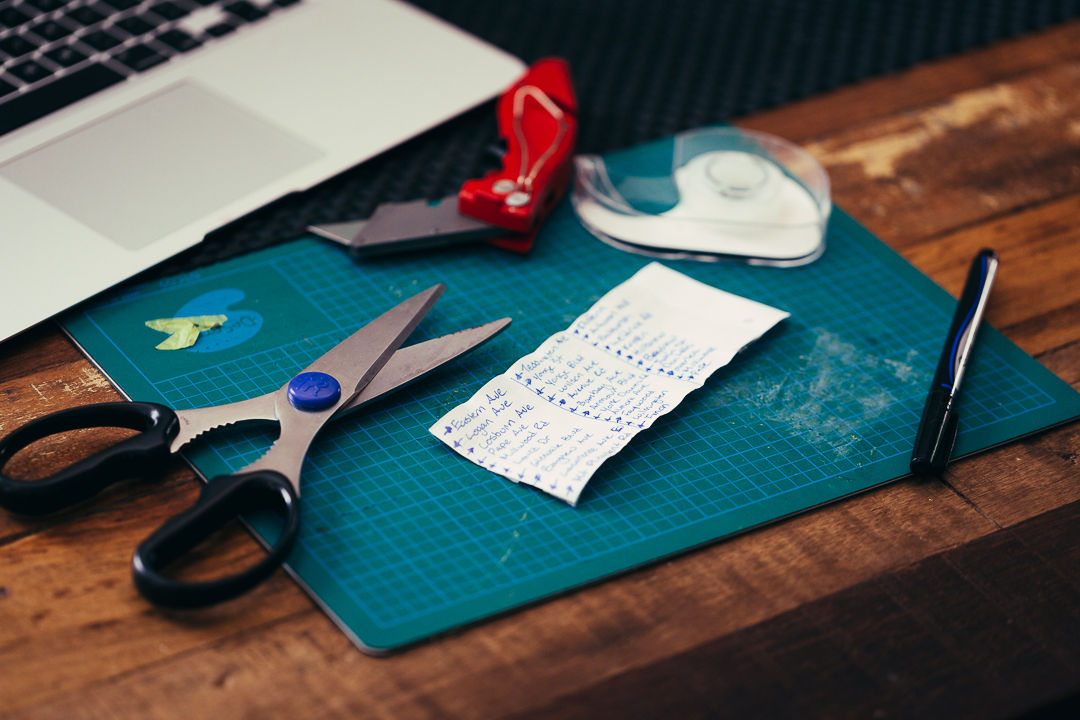
Prep
Write out the turn by turn of your route into 3 or 4 vertical sections.
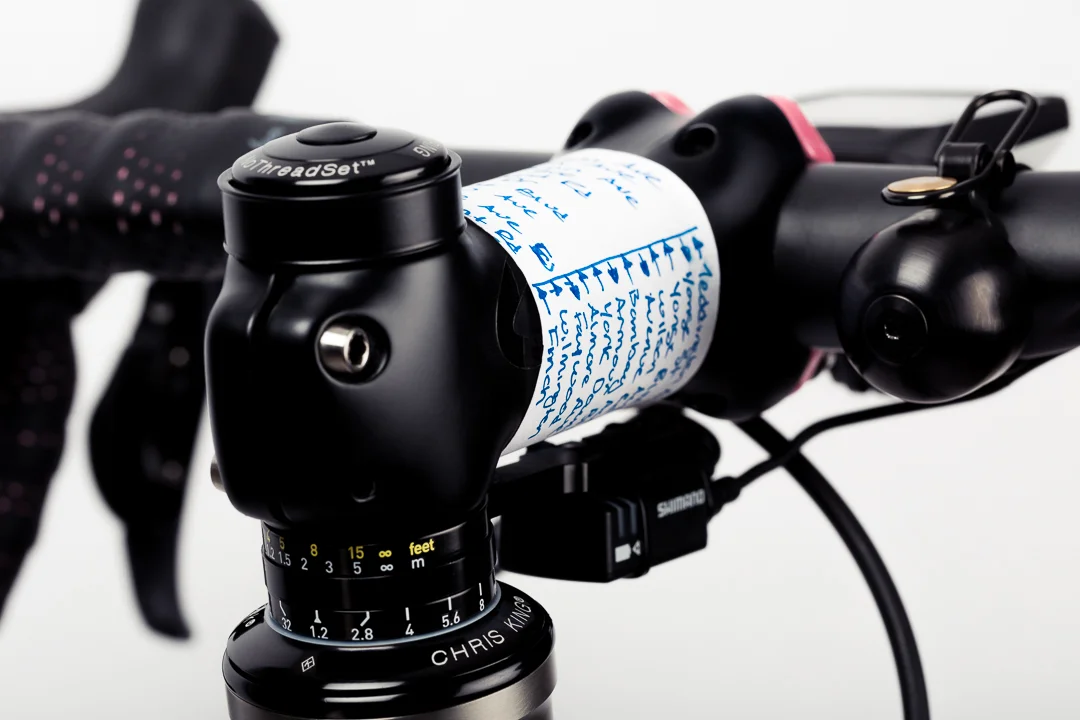
Wrap
Tape the que sheet loosely around your stem. Rotate the que sheet as you move through the ride.
There you go. Building a cue sheet for your stem is about as much work, maybe a bit more, than making a regular cue sheet. But if you ask me, it works so much better. When you head out, rotate the cue sheet so that the starting point is in the first spot. As your riding and you get through the first column, reach down and rotate the cue sheet to the next column and so on until you reach the finish.
If the route you are riding is a regularly travelled route then don't throw away the cue sheet. They can be used over and over again. Just carefully remove the sheet and place it somewhere safe. It's been made custom for stem so why not keep it around?
That's it. Hope that helps and enjoy the ride.


